
PS Design Process
We at PureSpaces are drawn to and love the whole process of interior design as much as we love its end product.
After receiving a client brief (sometimes even reference images and existing site images), we cannot contain the zest of a new project. It’s like an artist who receives a blank canvas, there’s a rush that we simply can’t help which runs through every fibre of our being.
We’re going to walk you through the trajectory of a project from the start, and how it transpires into a culminating design (which you might have got glimpses of if you follow us already)
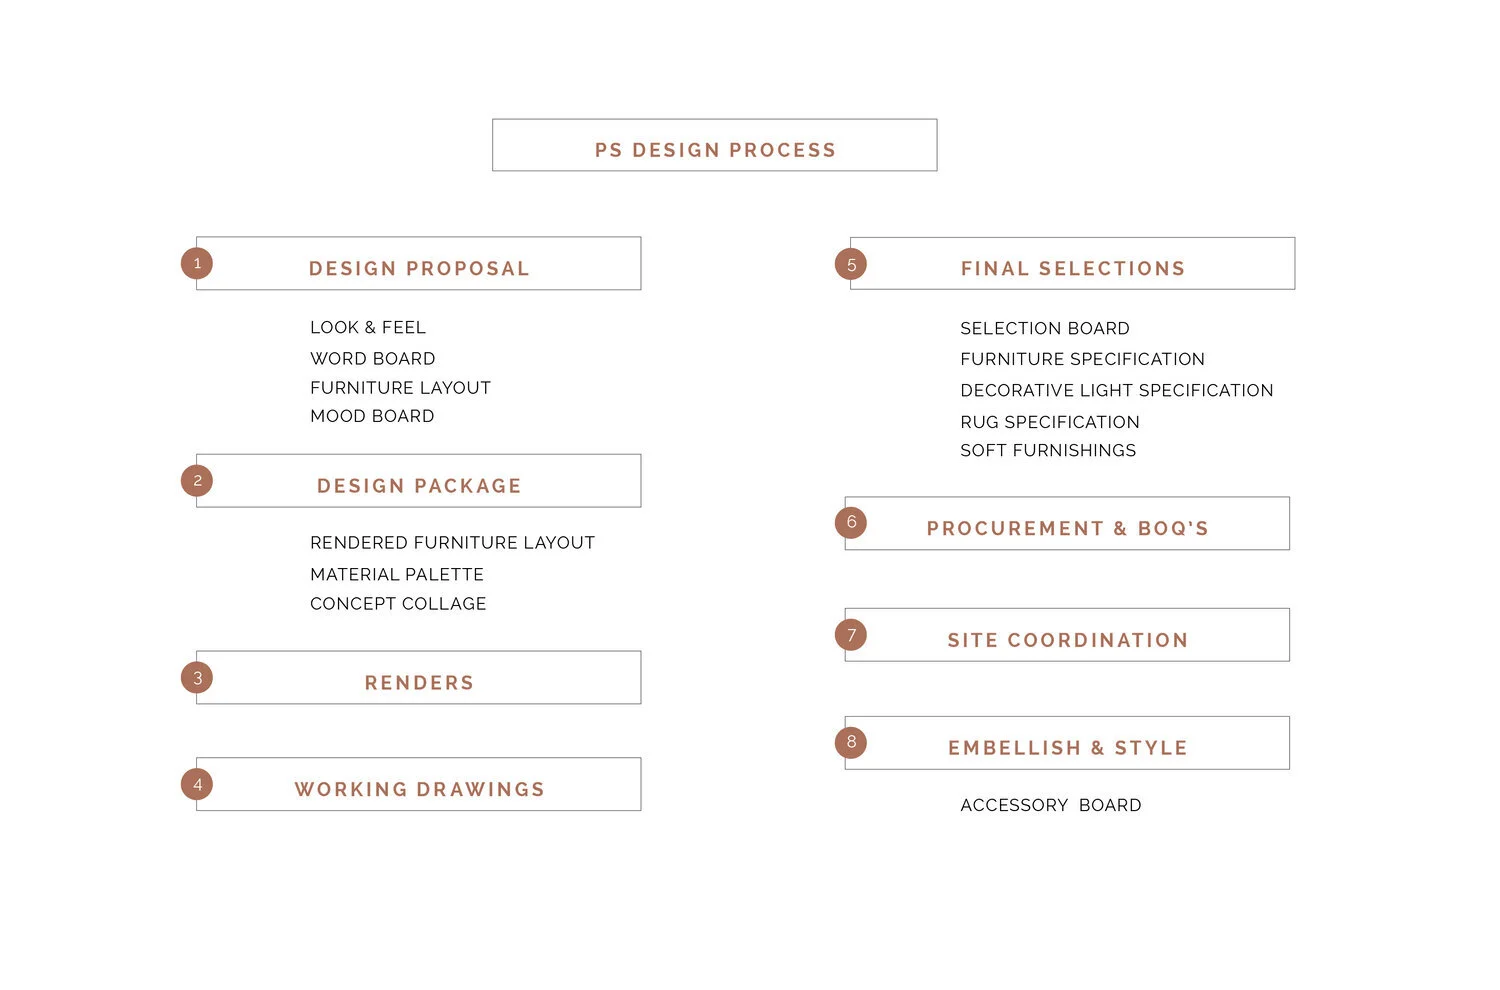
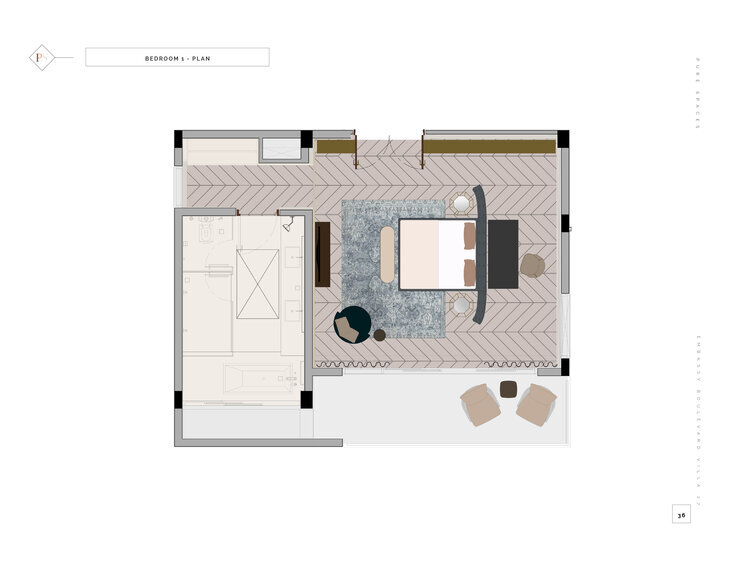
1. The Design Proposal
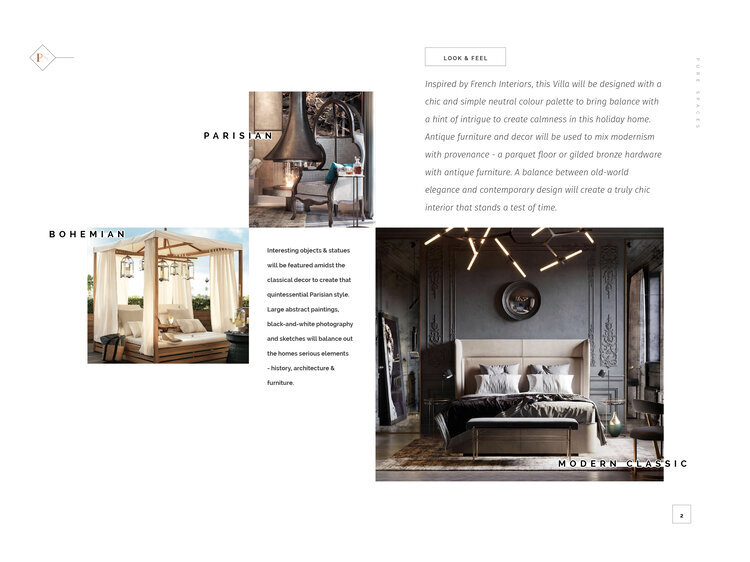
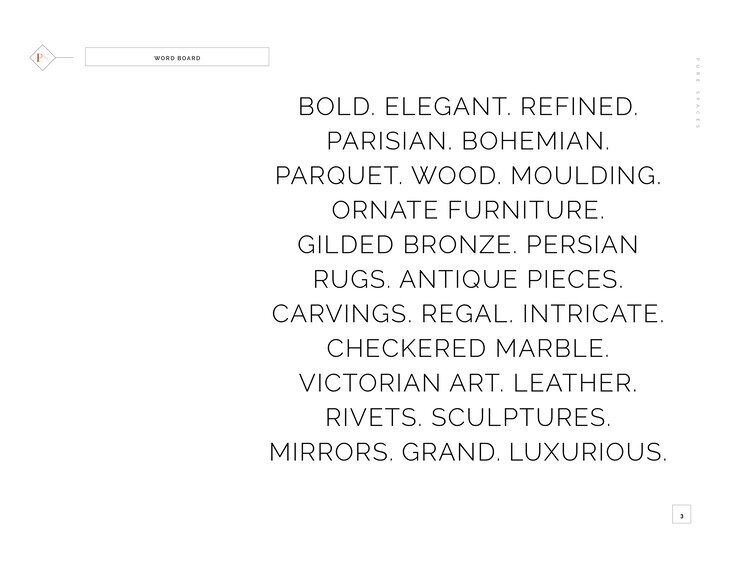
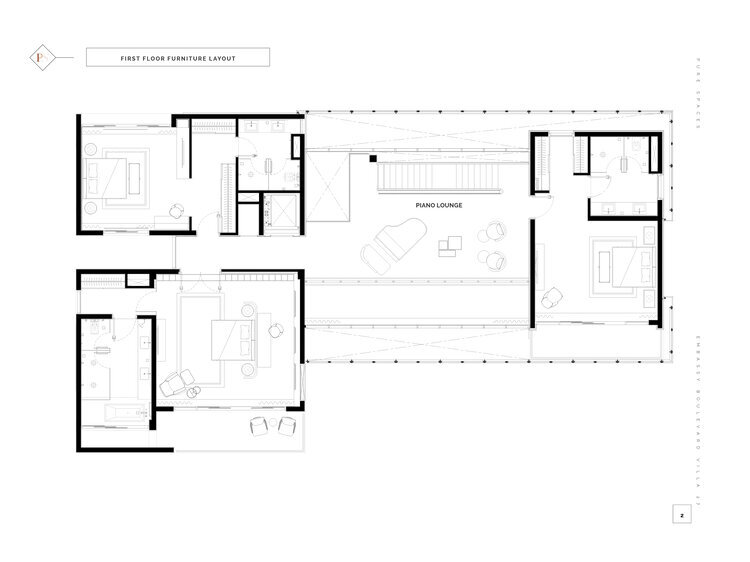
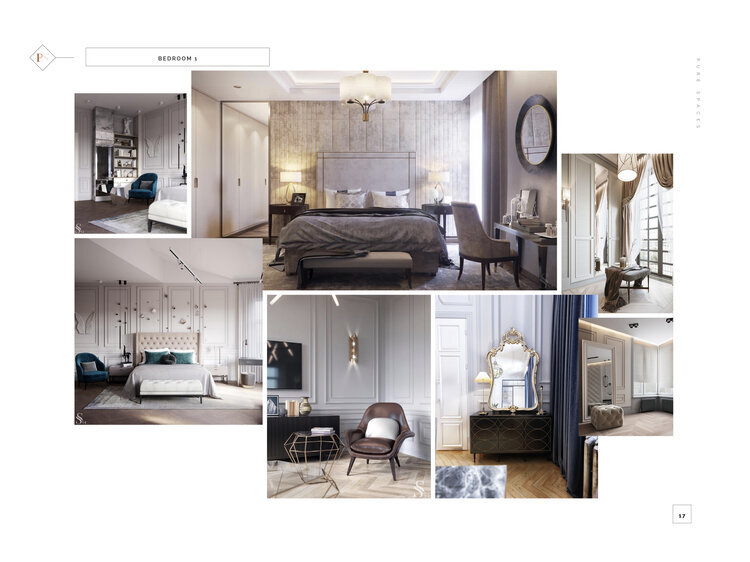
Stage one of this intriguing process begins post absorbing and studying the brief, existing site conditions and its context. The design proposal entails an initial presentation that exudes the mood that we are trying to create. Reference images for each space are gathered by scoring through various design feeds and magazines keeping in mind the style. This overall Look & Feel is brought about through a Word Board and Mood Boards alongside a Furniture Layout which fits in all the client requirements on plan.
This initial step aims at drawing inspiration and gathering client preferences.
2. Design Package
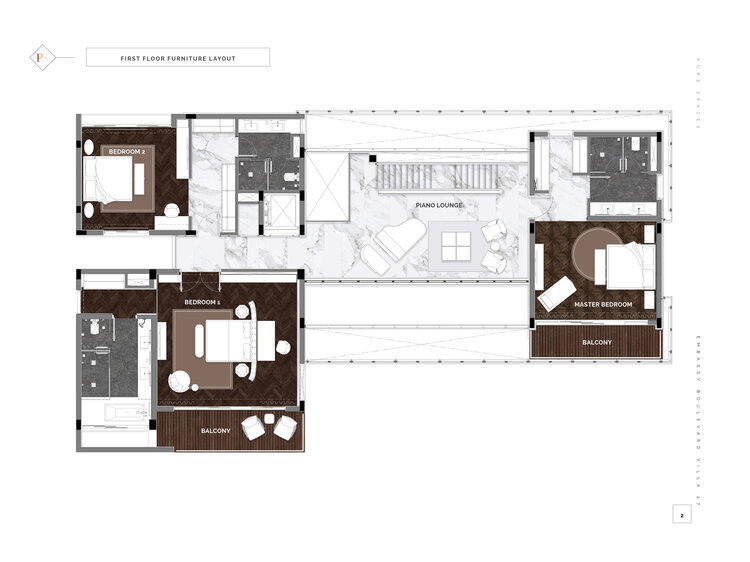
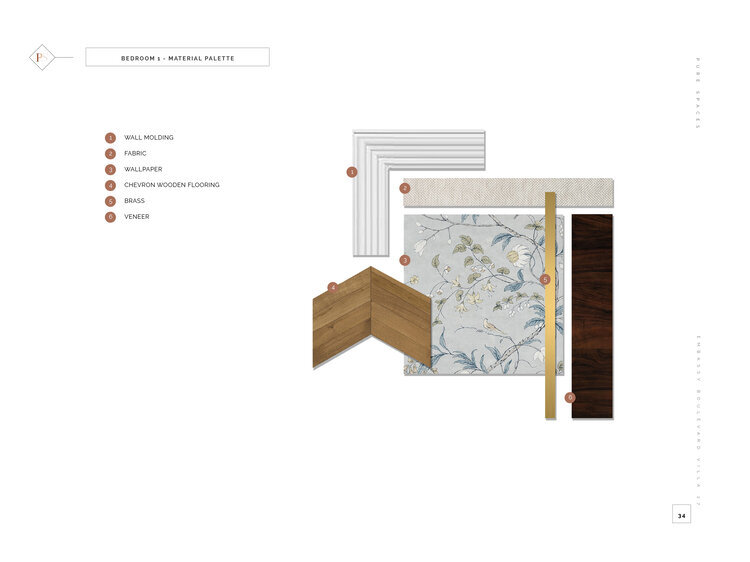
Here our inspiration begins to turn tangible and the design story slowly weaves itself together. Concept Collages or Schematic Elevations are created for each space, along with a proposed Material Palette and Rendered Furniture Layout with a suggestive design intent. Simultaneously we’re also scouting for materials (perfect marble, tiles, and really, the list goes on…).
This experimental step propels the project in a certain direction, indicates the initial feel of the design and how different elements sit together.

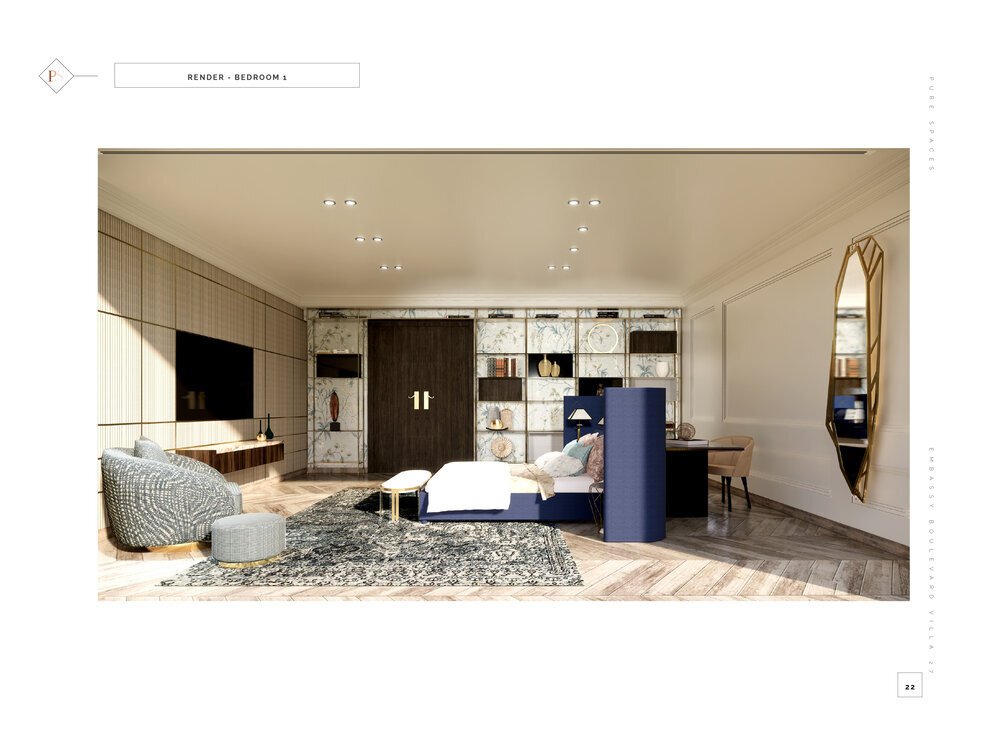
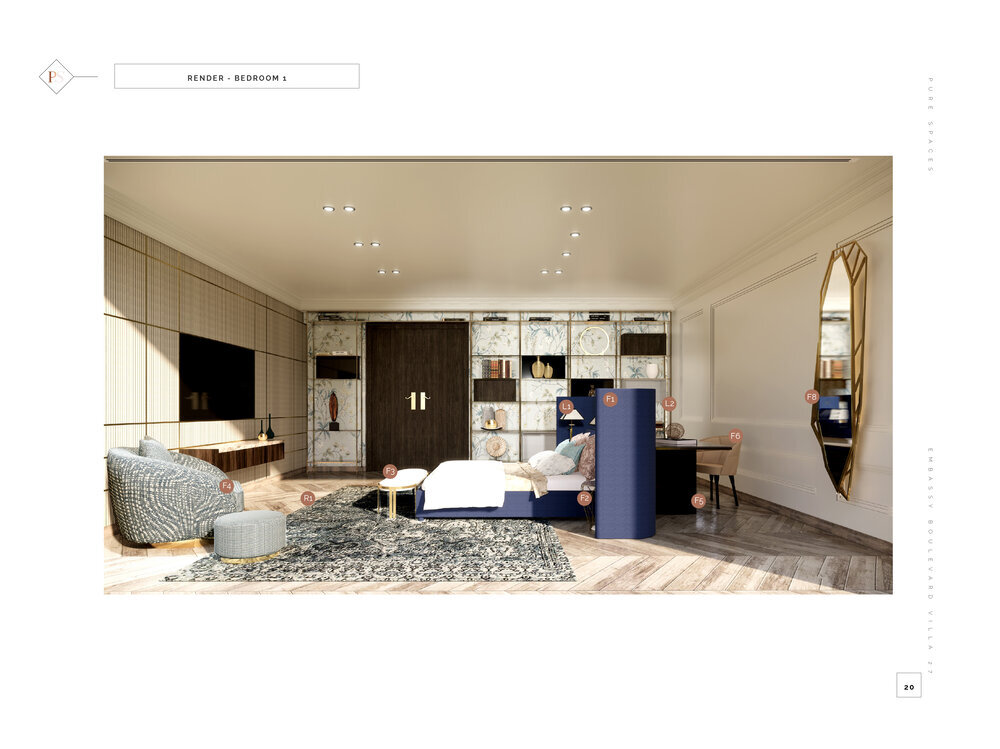
3. Renders
It’s not always work and no play. The next exuberant juncture involves bringing the conceptual ideas that we have envisioned into a three dimensional software that truly brings the space to life. These 3D models are rendered to enable a more accurate visualisation of each space. The aesthetics come through here, with a bit of tweaking and altering that takes place.
We absolutely love how sprightly and vital this part is for our clients as well as us as designers.


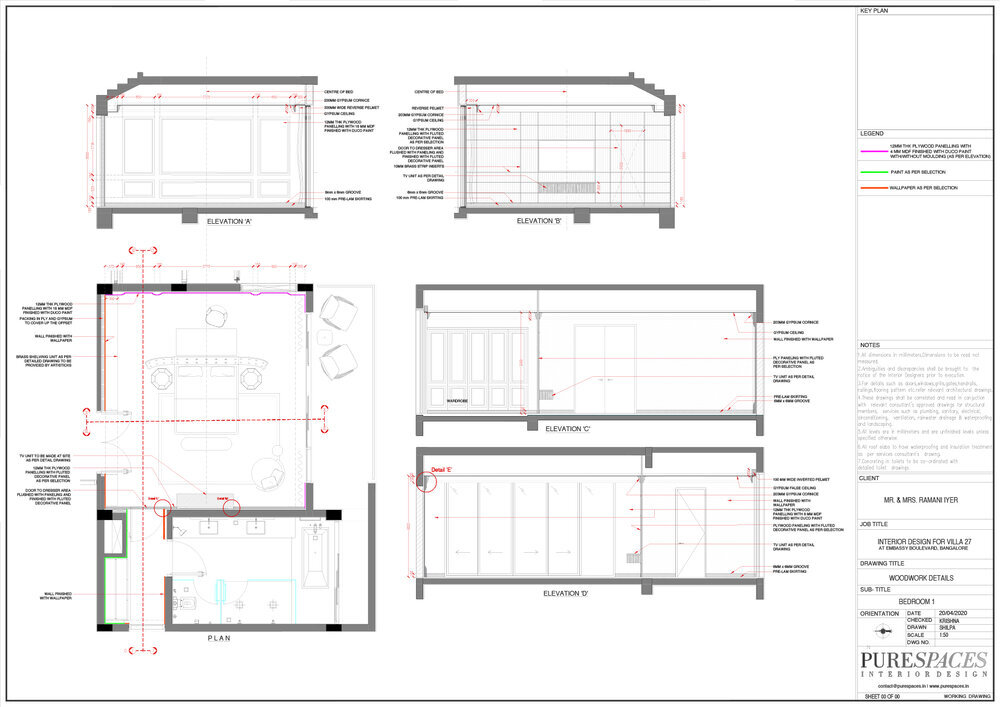
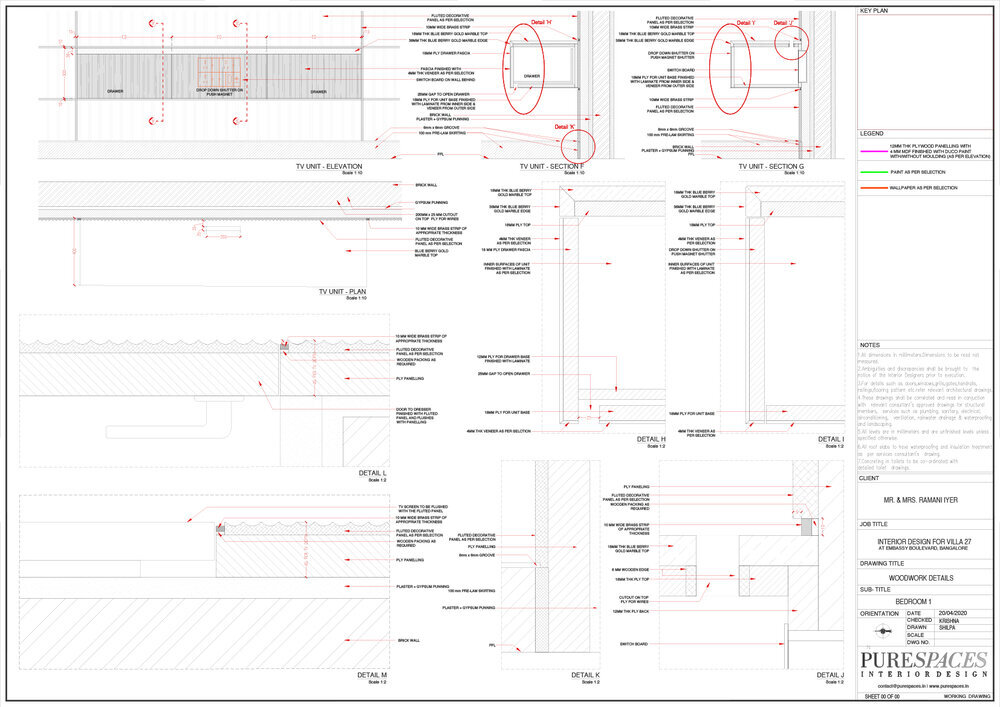
4. Working Drawings
An Interior Designer’s way of communication to its site staff is good drawings. Once the Renders are approved by the client, Working Drawings/GFC’s are created. These well legible and precise technical drawings are produced to hand over to site. This includes a long list and for the ones keen to know, here goes:
Furniture Layout
Flooring Layout & Details
HVAC Layout
Reflected Ceiling Plans/False Ceiling Details
Technical Lighting Layout & Details
Electrical Layout
Door & Window Details
Toilet Details
Staircase & Railing Details
Wall Elevations/Cladding Details
Kitchen & Wardrobe Details
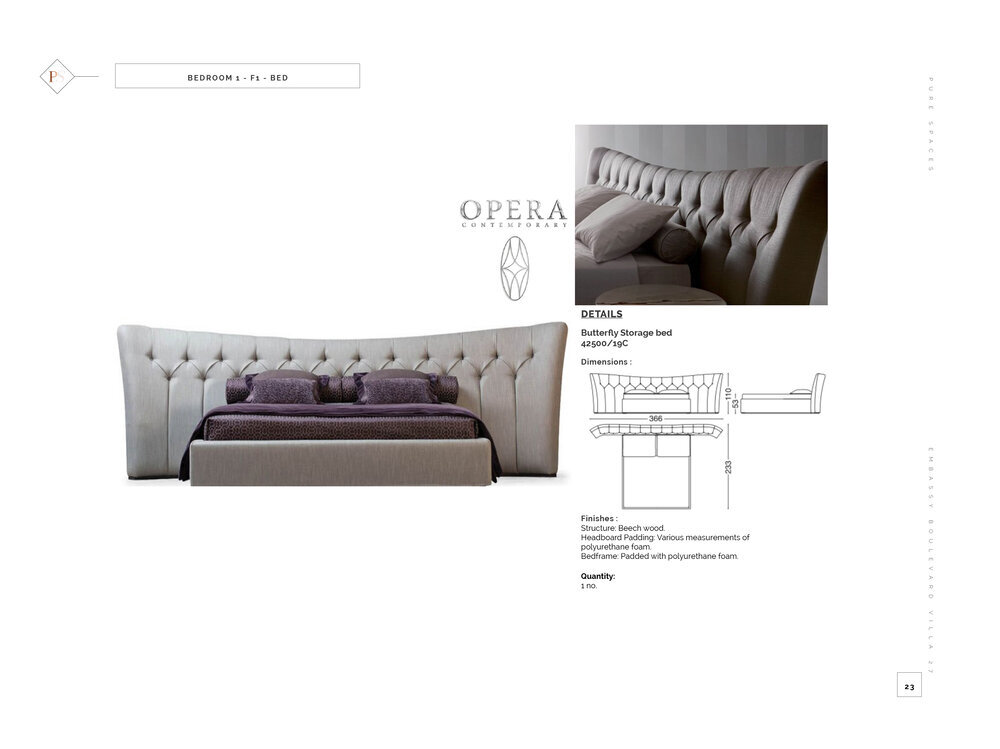
Detailed Furniture Drawings

Before the drawings are handed out, they go through a Quality Check (you bet!). Here are a few things we make sure are perfect:
Layout Format – Drawing Title, Scale, Date, Sheet Numbering, Revision Details
Design Constructability – Revisions & Corrections
Graphic Consistency – Lineweight & Linetype Scale / Standard Legend & Symbols
Legibility – Text Style, Text Height & Dimension Style
Professionalism – Nomenclature, Annotation, Spelling & Grammar
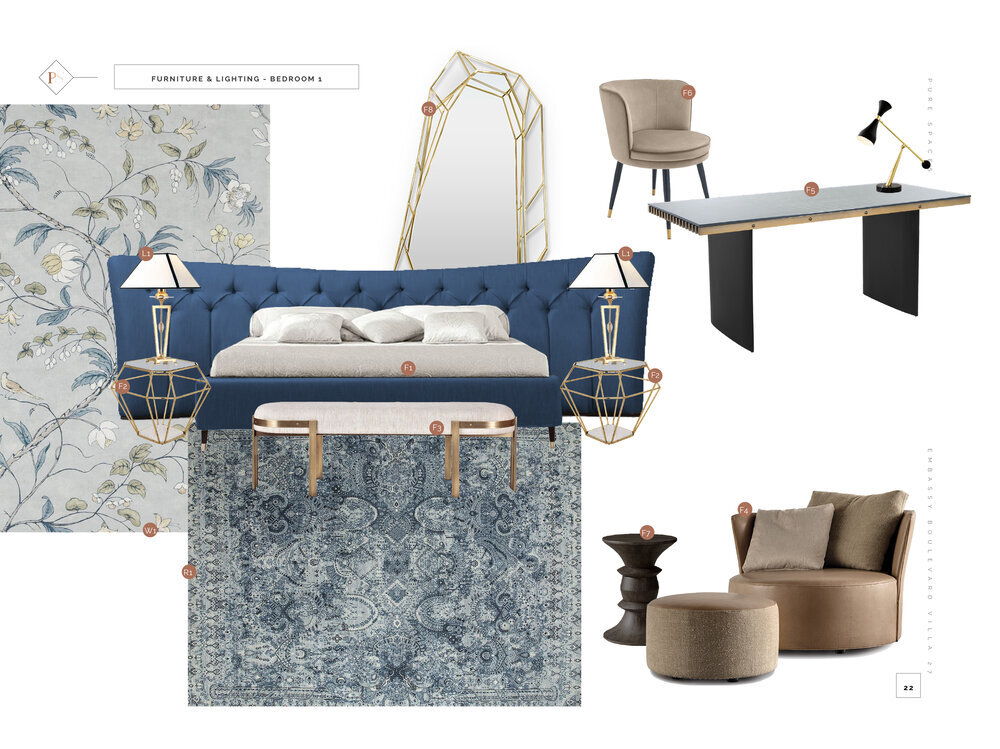
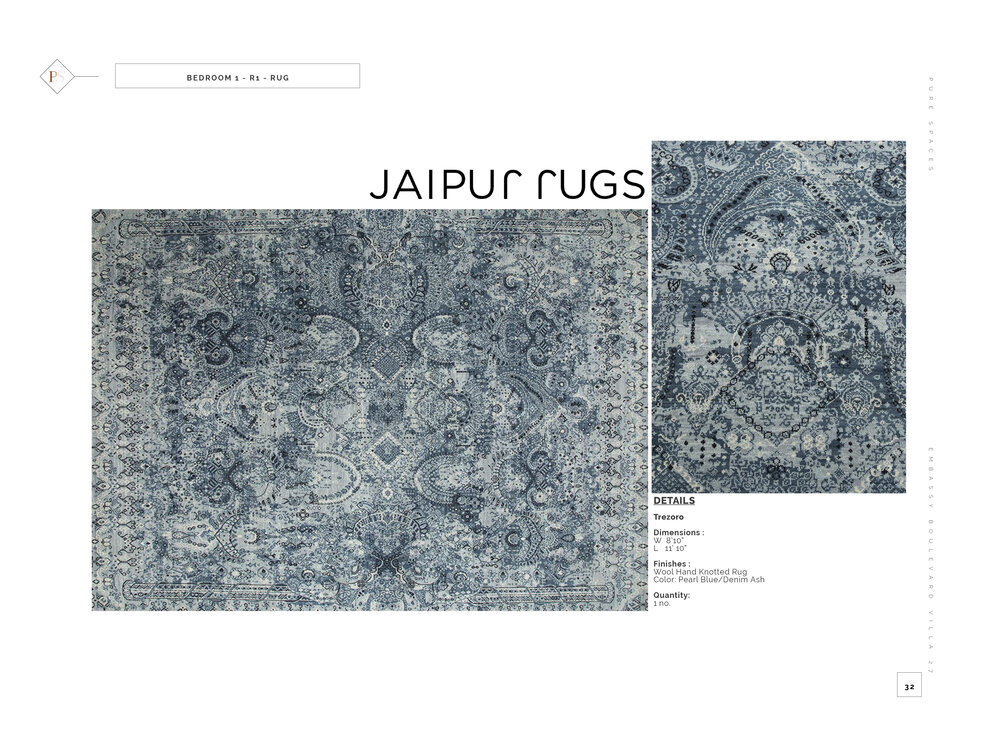
5. Final Selection
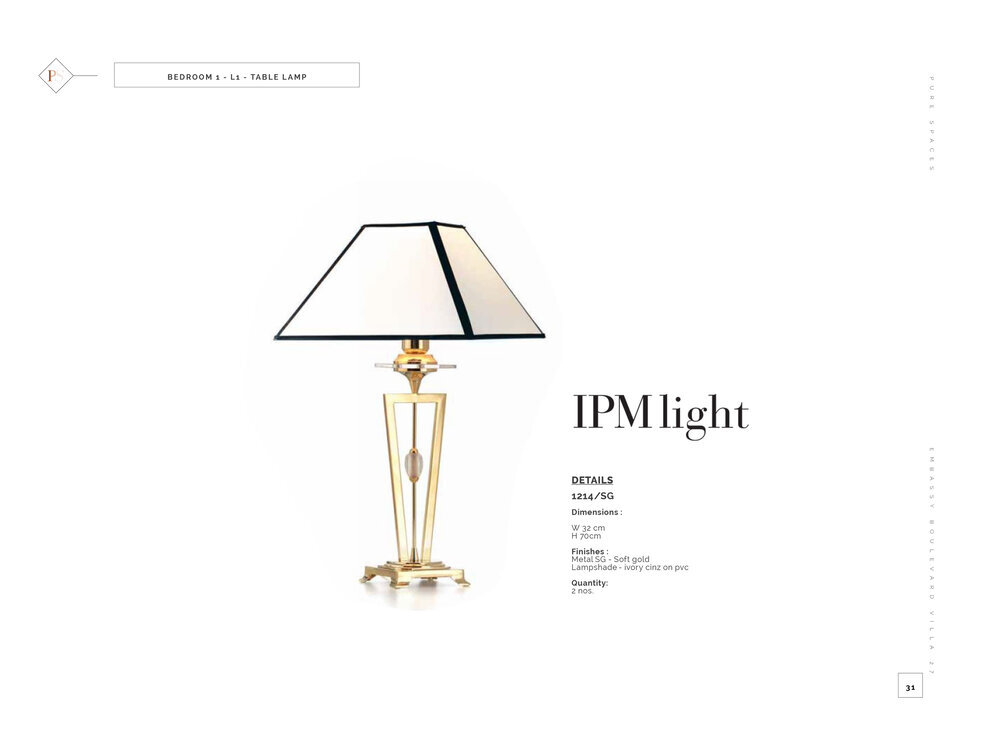
Decisions, decisions. We’ve definitely got to make the right ones here! This step helps us read together all the pieces curated so far by creating a Selection Board. This phase shows a clear picture with all the components and materials in their respective context to see how the spaces read together. Once we’re satisfied with it; the selected Furniture, Upholstery, Decorative Lighting, Rugs, Drapes & Soft Furnishings are detailed out separately and sent for quotations (both bought out and customised).
This stage helps us close on things, safe to say we’ve sealed it all by now.
6. Procurement and BOQ
Well, finally we’ve gotten to specifications, requirements, vendor quotes, final bills and receipts of payments. Quantities, numbers and figures play the part here and our calculations, coordination and comparisons see us through.
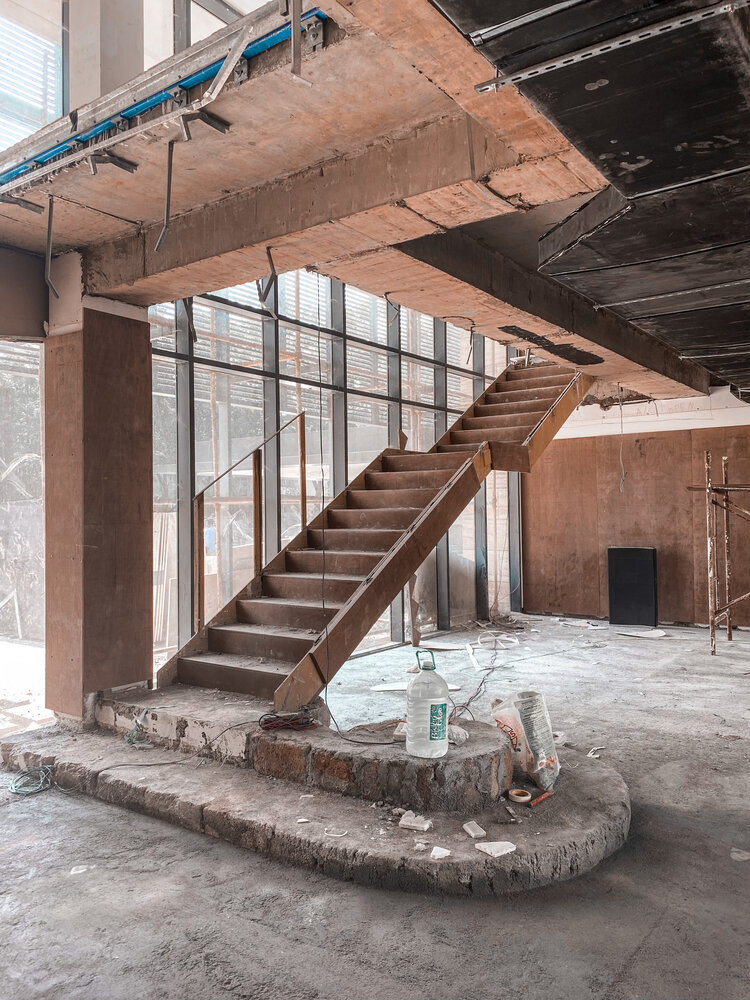
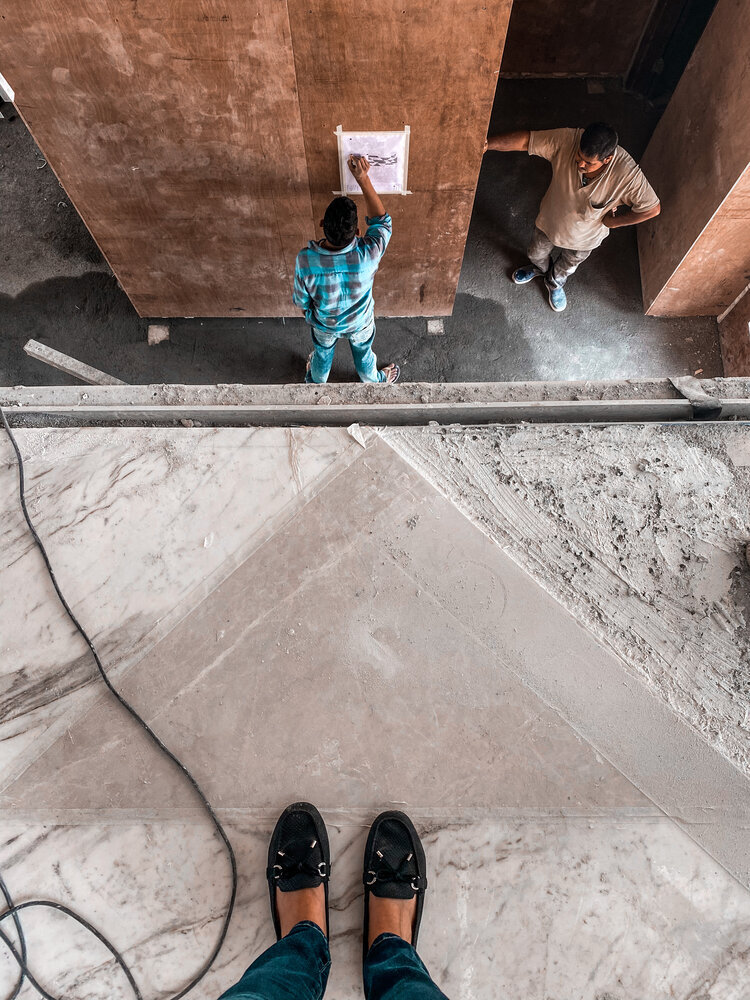
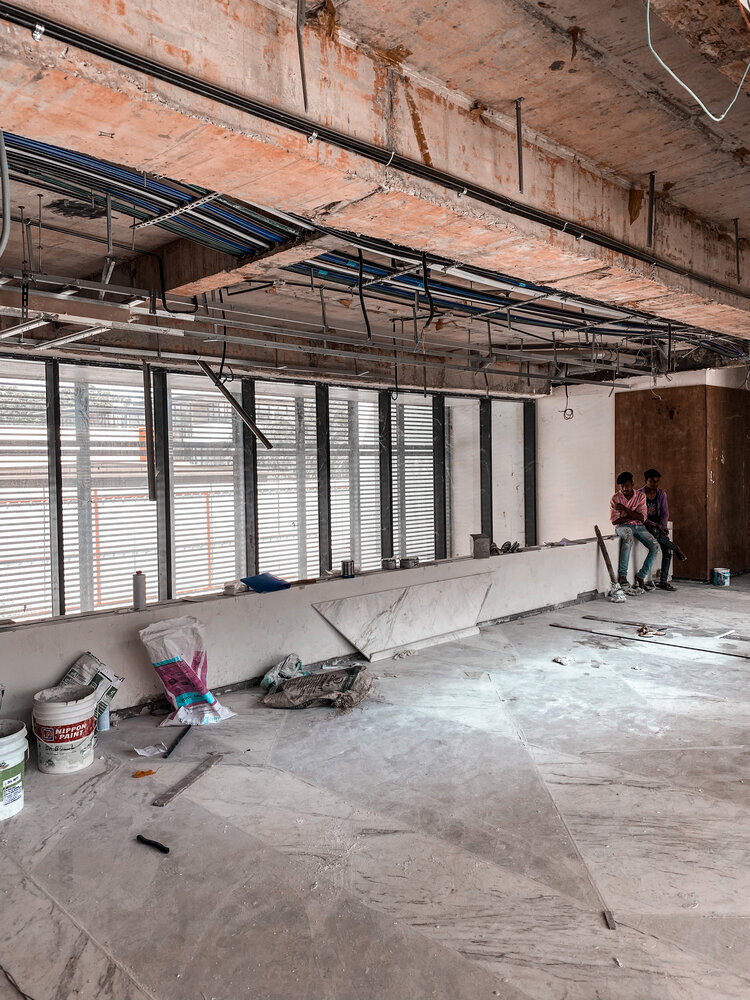
7. Site Coordination
On completion of all the above stages, signed and concluded. It’s then time to hit site. We make sure site visits take place periodically to ensure quality control, execution of design as per drawings, projected timelines and sorting out any difficulties that crop up.

8. Embellish & Style
Every detail further articulates and enhances the beauty of a space. Hand picked accessories, artefacts and art placed in the right fashion only further adorns it. This step of finishing (which we personally prefer to do) adds that final touch! ✨
Whilst, it’s undoubtedly magical to see a vision come to life (and how) we hope this post was informative and gives you a fair glimpse into how things work around here. We hope you’re staying safe and healthy!